Installing Crown Molding
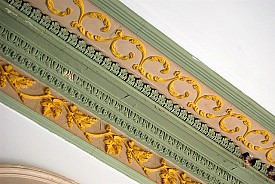
 Step into any older home, and chances are that your eyes are going to be drawn to the beautiful molding. Once a must-have in home design, molding has fallen by the wayside in newer construction in the interest of building cheaply and efficiently -- it's easier to forgo the molding not just during construction, but during painting. However, there's something cold and cheerless about rooms without molding, and it's not actually that hard to install if you want to add some architectural detail and interest to the rooms of your home, though crown molding can get expensive if you have it professionally done.
Here's why to do it, and then we'll talk about how.
The bottom line, of course, is that crown molding is attractive. It'll make rooms seem and feel more interesting, and it will become a conversation piece in your home. If you have a builder grade home and you want to add some custom elements and pizazz, crown molding will really help to make it appear more snappy and visually interesting. Furthermore, those traits mean it's going to add value to your home, because potential buyers will consider crown molding an added feature, especially if it was done right.
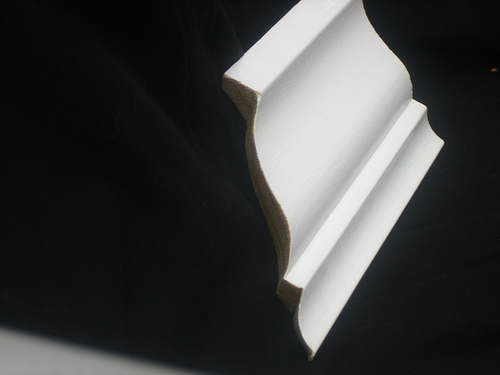
To install crown molding, you're going to need precut molding (unless you really want to level up with the difficulty and have a San Francisco carpenter custom-cut molding for you). It's available at most hardware stores and comes in a variety of styles. While it can be a bit pricey, it's totally worth it, we promise. You also need a table saw, which can be rented if you don't have or want to buy one. Wood glue, a hammer, nails, and lightweight sandpaper are also needed.
Along with that, you'll want gloves (for hand protection while using the saw), eye protection, and hearing protection.
What makes crown molding tricky and a bit scary to install is all the angles, because you want the lengths of molding to meet up seamlessly, even though they're rounding the corners of rooms. When you have a corner that points out, it's pretty easy; put 45 degree angles in each piece of molding and butt them together (you'll need to doublecheck that the corner is square first, because if it's not, your molding will look strange unless it's cut to the right angle). The pros like to use test scraps of wood to map out outward facing corners and use as templates for cutting the actual (and expensive!) molding.
When you have molding that meets in an inward-facing corner, it's a bit trickier, because you need a square cut on one end, and a coped 45 degree miter on the other. Cutting the angled joint is easy enough, but then you need to use a coping saw to carefully cut out along the molding so it will fit snugly against the other piece.
For cases where two pieces of molding need to be joined in the middle along a long wall, you need a scarf joint, made with two pieces of molding joined by 45 degree cuts. And when you get to the end of the line, you'll need to cut a return, a piece of molding that backs up against the end of the molding to create a neat little cap.
Once your molding is glued and nailed up, fill the nail holes with putty, allow it to dry completely, and sand smooth before painting. You can match your crown molding to the wall, but many people prefer to paint it in a contrasting color to make it stand out and look stunning.
Need more detailed tutorials with photos if all this talk of angles has you confused? Guides on installing crown molding are freely available online with lots of details.
Katie Marks writes for Networx.com.
Looking for a Pro? Call us (866) 441-6648

Painting Average Costs
Painters Experiences

The Stamped Concrete Patio I’ve Been Waiting For

My Deck Repair Was Simple But Perfect


