DIY Zip Line
 As any responsible parent knows, SWAT skills are essential for a child's development—and safety. Imagine your youngster trapped in a tall building and not knowing how to escape by zipping down the nearest telephone cable. A frightening thought, indeed. That's why at-home training is so important. Unfortunately, not every concerned parent has the means for a commercial zip line, which typically requires a large yard with a significant elevation drop, not to mention a sizable financial investment. But that's no excuse. By modeling the basic setup shown here, you can create a zip line for under $20 and fulfill your duty of preparing your child for life in an unpredictable world.
A Workout for Parent and Child
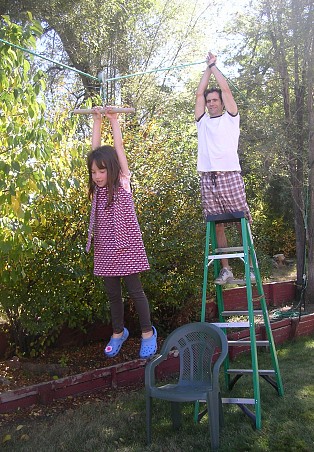
Before we proceed, a word of caution is in order (don't worry, this isn't about child safety; it's about deltoids). What makes this zip line work is that the parent or other trusted adult provides the change in elevation needed to propel the rider forward. The grownup stands on a ladder directly behind the rider's launching platform (any patio chair will do) and lifts up on the line itself, then holds the line overhead using both hands while the rider sails toward the opposite end of the line.
This does take some strength—how much depends on your child's weight. It's also worth noting that this is good exercise for both parent and child: You work your shoulders and triceps, and your kid gets a cardio workout running back with the trolley after each run (they'll also get a great start on building those Popeye forearms kids are so crazy about these days).
Disclaimer
And now for a word about child safety: You, not I, are entirely responsible for anything that happens to your kid as a result of zip lining. All I can say is, my zip line has been safe for my 40-lb. daughter for two summers, so far. Now, if you'll excuse me, I have to go find some wood to knock.
Equipment
To create my zip line, I used the following:
- 3/8-inch-dia. x 100-ft. nylon rope (I can't remember the load rating, but it was many times more than my daughter's weight)
- Ratchet straps (2)
- Stainless steel pulley
- Small carabiner
- Large carabiner
- Large galvanized eye lags (2)
- 1/4 x 4-inch galvanized eye bolt w/washers and nuts
- Wood broom handle
How-to
This is the procedure I followed:
1. Install eye lag at end of run. I drove the lag through the siding and into to a top wall plate (2 x 4) of a shed.
2. Knot end of rope to eye lag.
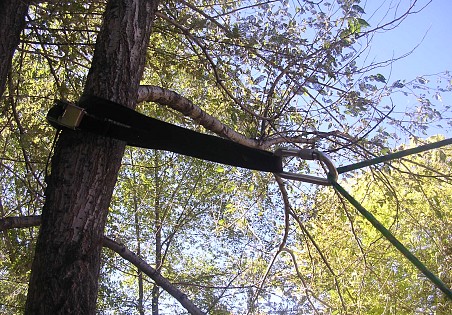
3. Tie ratchet strap around branch of distant tree, creating a few loops. Add large carabiner to loops (carabiner reduces rope friction).
 Ordinary webbing would work for the loops. In lieu of a tree, I would have driven another eye lag into my house or a good fence post.
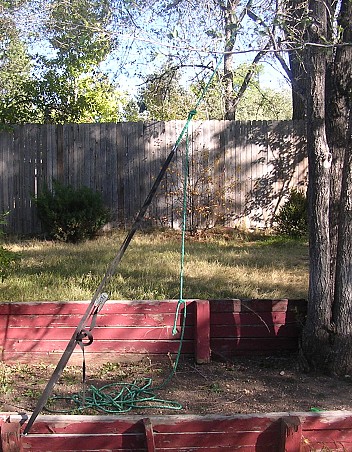
4. Drive second eye lag into wood anchor point near tree (fence post, wood retaining wall, or tree would work). Tie second ratchet strap to eye, leaving room for tightening strap with ratchet.

5. Thread free end of rope through pulley, then through large carabiner. Tie rope to second ratchet strap (or use another carabiner or locking link).

This setup makes it easy to tighten the rope, which is frequently required; the rope stretches with tension, exposure and use.
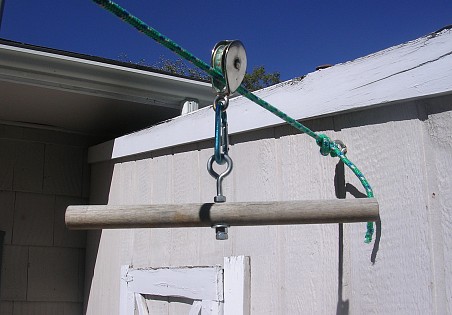
6. Build trolley (handle-and-pulley assembly) with a 14-inch length of broom handle, eye bolt, washers and nuts. Link eye bolt to pulley eye with small carabiner.

7. Set up tall stepladder near tree-end of line, with launching platform in front. Kid stands on platform and grasps trolley handle. On "Go," adult lifts line with a swift clean-and-jerk motion. Kid zips with glee, building essential life skills in the process.
Short on DIY skills ... or time? Hire a handyman to set up a backyard zip line.
Updated July 29, 2018.
Looking for a Pro? Call us (866) 441-6648

Related Experiences

New Low-Maintenance Landscaping To Update Our Yard

Garage Remodel: Converted To Deluxe Man Cave With Custom Cabinetry And Workbench


