The Secrets of Smooth, Even Drywall Finish
 Drywall installation can be described with those "three little words" that mean so much to homeowners in the midst of remodeling: quick, easy, and inexpensive. AKA wallboard, plasterboard, Gyproc, or Sheetrock (though these last two are really trademarks), drywall consists of a layer of gypsum plaster enclosed by two mats made of fiberglass or heavy paper. Compared to concrete construction, panels formed this way are lightweight and simple to use as non-load-bearing interior walls. They can be attached to ceiling joists or wall studs, using screws, nails, or even glue.
For good looks, drywall does require a finishing process before painting. Let's take a look at what that entails.
Covering Seams and Holes
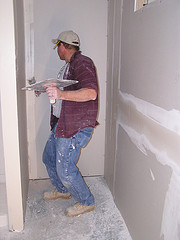
Installing drywall, by its nature, leaves seams at the joins between panels, as well as screw holes. These must be hidden before painting for an even appearance. To finish drywall, start by driving screw and nail heads deep into the material so they don't protrude. After that, conceal seams, holes, and other imperfections with joint tape, followed by drywall compound, affectionately known as "mud." Compound is available in both powdered and ready-mixed forms, and is applied with a flexible drywall-taping knife.
The most attractive results will be achieved by means of a "skim coat." This may refer to either covering the entire wall with an ultra-thin layer of compound, or veneer plastering; that is, applying a thicker coat of a substance known as "finish plaster."
Sanding and Cleanup
Once the compound has dried completely, it will need to be sanded smooth. This is a slow and dirty process, but it makes all the difference to a professional drywall finish. Cleanup of the mess that results from hand sanding can be avoided by fitting your shop vac with a dustless drywall sanding attachment. Sand lightly with 150-grit drywall sandpaper.
There is a difference of opinion about how much cleaning is necessary before painting drywall. Some state that you should vacuum up every bit of dust, while others prefer to leave a light coating on the drywall, claiming that the dust will bind with your primer and paint to provide the best surface finish.
Priming
Prepare your drywall by applying a heavy coat of high quality primer, either latex or polyvinyl acetate (PVA) designed especially for plasterboard. This step creates a water-resistant, smooth surface for your paint to cling to. It also prevents "thirsty" drywall from absorbing an excessive amount of paint. A roller is the best tool for primer application on drywall. Be sure to choose a primer that is a reasonably close match to the paint you'll be using for the top coat. It does not need to match exactly, but the primer should not be a great deal darker. Make sure the coat is as even as possible. Then allow to dry for 4 hours.
Painting
Now you're finally ready to apply water- or oil-based wall paint in the color of your choice. Matte is best, because it will not expose any roughness or irregularity in your sheetrock as glossy paint tends to do. Sand your primer and clean off the dust (or possibly not, as per the discussion above). Roll the paint onto the drywall, keeping up a steady, even motion and ensuring that all gaps are filled. Cut in the angles with a brush. Once again, let your handiwork dry for 4 hours before sanding the surface and applying a second coat of paint. Finish up with another 4-hour drying period. For professional help on your next drywall project, contact a drywall contractor near you.
Laura Firszt writes for networx.com.
Updated June 5, 2018.
Looking for a Pro? Call us (866) 441-6648


