Paver Installation Can Make Your Yard Look Awesome
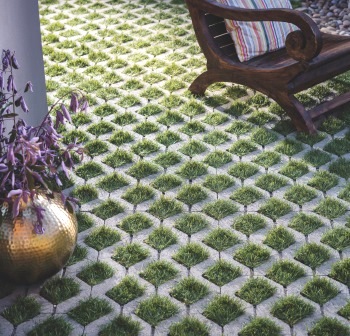 Time to get your hardscape in shape for outdoor living! Paver installation is a great way to make your yard look amazing; it’s also long-lasting, flexible, and simple to maintain.
I spoke with Joe Raboine, Director of Belgard Residential Hardscapes, who has a fascinating, in-depth store of knowledge. The result of our conversation? The following guide to paver installation – pros, cons, prices, maintenance, and lots more.
What types of pavers are available?
Materials
Four core types of paving materials are used for residential hardscapes. The oldest is stone pavers, then clay, and most recently interlocking concrete pavers -- what Belgard primarily manufactures and sells. There are also porcelain pavers, new within the last 5 years.
Shapes
The most common shape is a rectangle, which runs the gamut of sizes. The small rectangular pavers resemble handmade cobblestones like you’d see in European cities. Those get progressively larger, up to what’s called a “slab size,” typically 12x12 inches or even larger. The biggest are 2 feet by 3 feet. In addition, there are hexagons and trapezoids for a slightly more contemporary look.
Colors
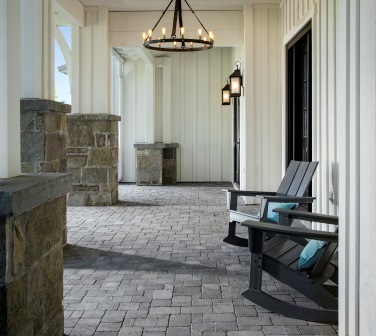
An almost endless variety of colors is available, both solid and blended. Solid colors have really caught on over the last few years but the blends are still the most popular choices. I think those blended colors will always be popular because they mimic local natural stone, varying across the country.
We have a team of experts from both Marketing and Production constantly studying color trends and what is common and suited to local markets. It’s quite a challenge, given that we operate 13 different divisions across North America.
Where are pavers used?
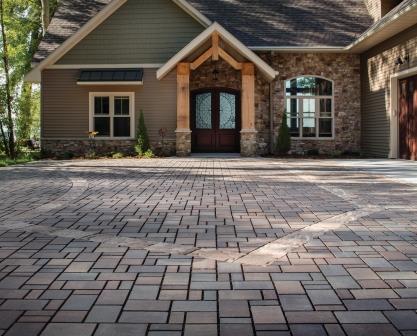
Use pavers for your patio, walkway, pool decking, or outdoor living room. Paver installation is great for driveways and other vehicular applications, too. In some markets -- Texas, for example – paver driveways have almost become the norm.
What are the major advantages of pavers?
- Beauty. Pavers look awesome and add a lot of landscape design appeal to your yard or driveway area. Blended colors will harmonize with their surroundings because they reflect the shades of indigenous local stone.
- Flexibility. Because a slab of concrete will move, shift, and ultimately break, you have to add expansion and control joints. By contrast, pavers are a flexible system, which acts like a blanket that’s placed on the earth.
- Longevity. Pavers have been around since the Romans used them to build roads... and some of those are still in existence today.
They’re considered a flexible pavement. Due to their flexibility, paver installation lasts 50+ years if done as recommended. That’s true in any climate – even one with harsh winters or very hot, dry weather.
In fact, because they're strong and manufactured in a controlled environment, concrete pavers often carry a lifetime transferable warranty. You would never get a warranty like that on poured-in-place products!
- Ease of repair. Another great thing about pavers is that they’re easy to repair. If you drop something extremely heavy on a paver and crack it, or you spill oil on it, you can take out the damaged paver and put in a new piece.
The simplest way to remove a paver is to crush it with a hammer and break it out of there. Once you replace it with a new one, you can just sprinkle in some polysand, brush it off, and you’re good to go.
And the disadvantages of pavers?
- Potential problems from faulty installation. Just like any other building material, you ideally need to have someone that’s been professionally trained and certified to install large-scale paver projects. Substandard installations will cause issues.
- Cost. Because there’s more prep time, pavers will cost more than concrete (or asphalt, for a driveway) but since they’re so durable, they end up costing you less in the long run.
What’s the cost to install concrete pavers?
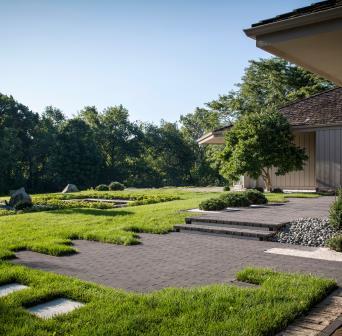
Essentially the cost to install concrete pavers is between $5 and $25 a square foot, which is kind of a crazy range. But there’s a reason.
In Southern markets like Florida, you may get pavers installed for $5-$10 a square foot, because of the sandy subsoil and because you don’t get hard freeze-thaw cycles. In the North, where you need a thicker substrate to lay them on, cost starts at $10 and can go up to 20 or 25 dollars per square foot.
Consider the cost of the paver material itself, as well. Between the less expensive and the higher-end pavers, there may be a $3-$5/sq ft difference.
Your region is also a factor: how much aggregates cost locally, how much trucking is involved, and whether there’s the ability to work year-round. In Northern markets, paver installation can be done only 7 or 8 months, while in Florida it’s all year.
Describe the process of paver installation.
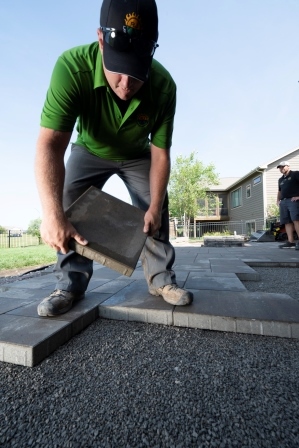
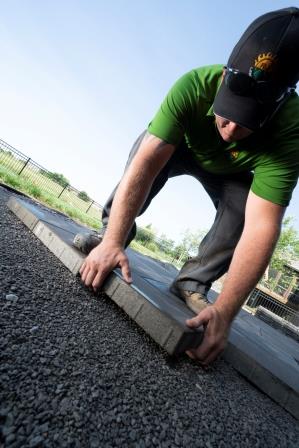
- Paver installation involves more prep than poured concrete, starting with excavation, followed by laying a substantial base -- usually gravel. Next comes a ¾” layer of bedding sand. You’ll need some kind of edge restraint, like concrete or spiked plastic, to keep the paver installation together and lock it in tightly.
- Once the pavers are laid and cut, they’re compacted again with a plate compactor that drives them down into the bedding sand.
- Next, sand or polysand is applied between the pavers and compacted to strengthen the joints, so that the paver installation acts like one monolithic piece. This allows it to move and flex, without worry of the cracking issues you’d have with a slab of concrete or even asphalt.
When can a homeowner DIY a paver project vs hiring a pro?
To make small-scale paver installation a DIY-friendly project, we recommend Techniseal ™ EZ Base foam. The great thing about it is that you don’t have to dig down and get rid of all the subsoil, or bring in a load of gravel. Instead, strip off the sod and put down just a little bit of sand. Apply the EZ BASE layer; then put the pavers on top of it. After that, you compact and sand the joints normally.
Even with traditional excavation, for sure a homeowner could do a small walkway or patio. If you keep it modular in design with few cuts, it’ll be even easier. You could just use a hammer and a brick chisel to split the pavers – or rent a saw with a diamond bit from your local Lowe's or Home Depot. (Be sure to use a wet saw to control the dust.)
When you get over a couple pallets of material, though, there’s more involved in laying the pavers out and getting them to drain exactly right. By the time you rent the equipment you need (like saws and compactors), it’s not much more expensive to hire a contractor to do your paver installation.
Please give some tips for paver maintenance and repair.
- Seal. Concrete pavers are used outdoors, exposed to wind, and freeze-thaw. If you want to slow down erosion, preserve the color, and keep your paver installation looking fresh longterm, sealing definitely helps. Some sealers will last 5-10 years and are simple to apply. They soak deep into the pores of the concrete to repel water.
- Sand. Nowadays an amazing product called polymeric sand -- which is like a flexible grout -- is used in the joints rather than plain sand. Polymeric sand will add only about 30 cents a sq ft to the install. It actually adheres to the pavers in a mortar-like bond and stays pliable yet it won’t allow any dirt or weeds between pavers. I would say using it should be standard practice.
- Add joint-stabilizing sealer. For existing pavers, you might want to add a joint-stabilizing sealer that acts like polymeric sand.
- Clean carefully. Although you can power wash pavers with a wide-angle head, a mild spray-on paver cleaner is much safer. Just use your garden hose to rinse it off. That way, you don’t have to worry about using too much pressure or blowing sand out of the joints.
What are permeable pavers?
The biggest trend in the past 5 years, and one that will continue to grow, is “permeable pavers” (also known as pervious pavers), which allow water to run through the paver, not off of it.
There’s a common misconception. Homeowners say, “When I put in pavers, the water will drain through, because there’s joints everywhere.” That’s not true with standard pavers, though, because the joints are filled.
When you’re talking sustainability, permeable pavers help not only with nonpoint pollution but also with aquifers. They play a role in cleaning up the groundwater because when water settles in through the soil, microbes in the earth will help break down any oil that comes off your car, for example, and then filter it before it gets back in the groundwater.
Permeable pavers are just starting to take off residentially, but they’ve been around for quite a while commercially.
What’s the recommended timeline for a paver project?
Winter is a great time to get started, especially if you’re looking at doing a project in the spring. Do your research: look at catalogs online and visit dealers to view displays and samples.
In February and March, contractors in the North start making plans and booking business for the coming season. We hear a lot of homeowners say, “I want a paver installation, but I’m not quite ready to do anything till spring.” By the time spring rolls around, though, most contractors are already booked solid. So the sooner you get going, the better.
Any final thoughts on paver installation?
I was a contractor for a long time and I’ve been in the industry almost 30 years altogether. It’s fascinating to see – there’s a paver product out there to fit any home style or aesthetic these days. When we started, there were only a few choices and a handful of colors.
Pavers have really evolved into this design-driven option which can make a huge impact on the beauty of your home.
Laura Firszt writes for networx.com.
Looking for a Pro? Call us (866) 441-6648

Landscaping Average Costs
Landscapers Experiences

A Great Contractor Will Guide You In Remodel Decisions That Work

My Son’s Stamped Concrete Patio Was A Fast Track, Quality Job


