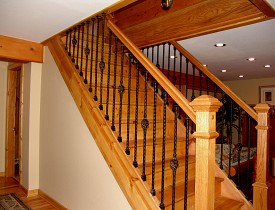
Iron Stair Baluster Installation
 Are you looking to replace your current wood stair balusters with iron ones? (In case you're wondering, balusters are the uprights that support your stair railings and keep children safe from tumbling through.)
Wood to Iron Stair Baluster Conversion
I have done a number of wood-to-iron stair baluster conversions. Some were where the old turned wood balusters are upgraded to wrought iron and the existing railings were used. This process is nice and easy when the spacing and hole locations remain the same. Others were where 2 x 2 outdoor deck type balusters were removed and new railings were installed; posts and rails needed to be installed and new mounting holes drilled.
Add Wooden Posts to the Mix
Usually, wooden posts are added to the mix to provide some design continuity with the wood handrails. I mount these wooden posts with a special mounting kit that uses “L” shaped metal brackets which connect the post to the floor with some heavy screws, a special wood trim kit covers the metal brackets. In most cases, the posts and handrails are installed sequentially.
Install the Wrought Iron Balusters
After the handrails are in place, install the wrought iron elements. Once you determine spacing (normally 4" or less -- check your local code), drill holes in the bottom of the handrails and either the flooring itself or a newly installed lower rail. Some railing manufacturers recommend epoxy to firmly set the iron, but I find adhesive caulk is just as good. It takes a bit longer to fully cure, but is much easier to work with and clean up.
Cover the holes where the iron is mounted -- top and bottom -- with additional trim pieces (“shoes”). These shoes come in standard flat profiles for horizontal runs or angled versions for use on stairs. The shoes have a recessed set screw that keeps them in place.
Some folks may be intimidated working with metal instead of wood, but a thin bladed metal “cut-off” wheel mounted in a chop saw or hand held grinder can make quick work of cutting this material to length. That, and a simple spacing layout, can transform a railing or staircase in no time.
If you'd prefer not to tackle this project yourself, find a professional handyman to take care of it for you.
Kevin Stevens is a Networx writer.
Updated December 6, 2018.
Looking for a Pro? Call us (866) 441-6648

Remodeling Average Costs
Remodeling Contractors Experiences

Cast Iron Bathtub Replacement Was Definitely Not A DIY Project

Beware Of Bad Contractors! Take My Advice To Protect Yourself


