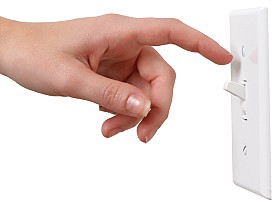
How to Replace a Dead Electrical Switch
 Replacing a light switch is a very easy do it yourself task, whether you need to replace a dead switch or you want to upgrade a switch to add a dimmer or other features. As with any project involving your household electrical system, please use caution, and if you identify signs of a more serious electrical problem, stop and call an electrician.
Presenting our step-by-step guide to replace a dead electrical switch.
1. The first step is turning off power to the switch at the junction box, where individual breakers should be labeled to indicate which area of the house they supply. Turn off the power for the appropriate switch and alert other members of the household to the fact that you’re working on the electrical system so they know not to turn it back on.
You might even want to consider attaching a note to the junction box while you’re working. Don't think this is important? Maybe this will convince you: The Orlando Sentinel reported that there was an explosion at an car dealership when an Orlando electrician mistakenly opened a power box without knowing that a live wire had energized it.
2. Return to the site of the switch and carefully remove the faceplate, setting it and the screws aside. Use an electrical tester to confirm the switch is not energized. These useful tools are inexpensive and available at most hardware and home supply stores. If the switch is still energized, return to the junction box and try different breakers until you find the right one. (Remember to update the labels when you’re done!)
3. With the power to the switch off, remove the screws that hold it into the wall and pull it out gently to avoid breaking or stressing the wires. Unscrew the wires from the terminals on the old switch, starting with the neutral wire. If the hot and neutral wires are not clearly labeled, wrap them in electrical tape so they are. Hot wires should be black, while the single neutral or ground wire should be white or green.
If the hot wire is cracked or the insulation is fraying, cut it below that site, when possible; remember not to cut the wire too short or it will be hard to work with. If this isn’t an option, wrap it well in electrical tape. You don’t want exposed electrical wires, because this could cause a short.
4. Check for signs of an electrical short, such as black smears or crumbled material inside the switch receptacle. These may indicate a problem with the household wiring. If everything looks like it is in good shape, you can pull out your new switch and attach the wiring to the terminals. Connect the ground wire last, taking care to make sure the wires don’t touch each other while you work and that the terminals are firmly screwed down.
5. When you’re finished, gently push the switch back into the wall and screw it in place. Turn the power back on and check to confirm that the switch is working. If you hear a popping noise or notice sparks and smoke, something is wrong; disconnect the power again, check your wiring, and retest. If the problem continues, contact a licensed electrician.
6. If the switch works smoothly and without incident, reattach the faceplate; you’re done!
s.e. smith writes for Networx.com.
Updated August 13, 2018.
Looking for a Pro? Call us (866) 441-6648

Electrical Average Costs
Electricians Experiences

Electrical Installation As Part Of A Living Room-to-Office Conversion

Electrical Upgrade Including New Breakers And Replacement Wiring


