How to: Make a Counter Top from an Old Door
 A couple of years ago, I set out to re-do my old and outdated kitchen. Through a trade of services, I was receiving all new appliances, but beyond that, I had little money for a Boston-area remodeling contractor, so I decided to do it myself. My initial budget was $300, although it did “balloon” to nearly $500 by the time the work was complete.
The kitchen was a tiny, T-shaped area with limited counter or storage space. However, there was room along one of the walls to add a narrow counter that could provide both surface and hidden storage space. On such a limited budget, I had to get really creative with the use of materials to accomplish my goals.
In my garage, I had an 18” wide closet door that I’d removed from a small linen closet several years earlier. At about 77”, it was the exact right length for the wall and while I would have preferred a 15” deep counter, I made do with 18”. I could have cut the door down, but had neither the tools nor the skill to tackle that type of work (I am an interior designer, not a carpenter). Here are the steps to making a countertop from an old door:
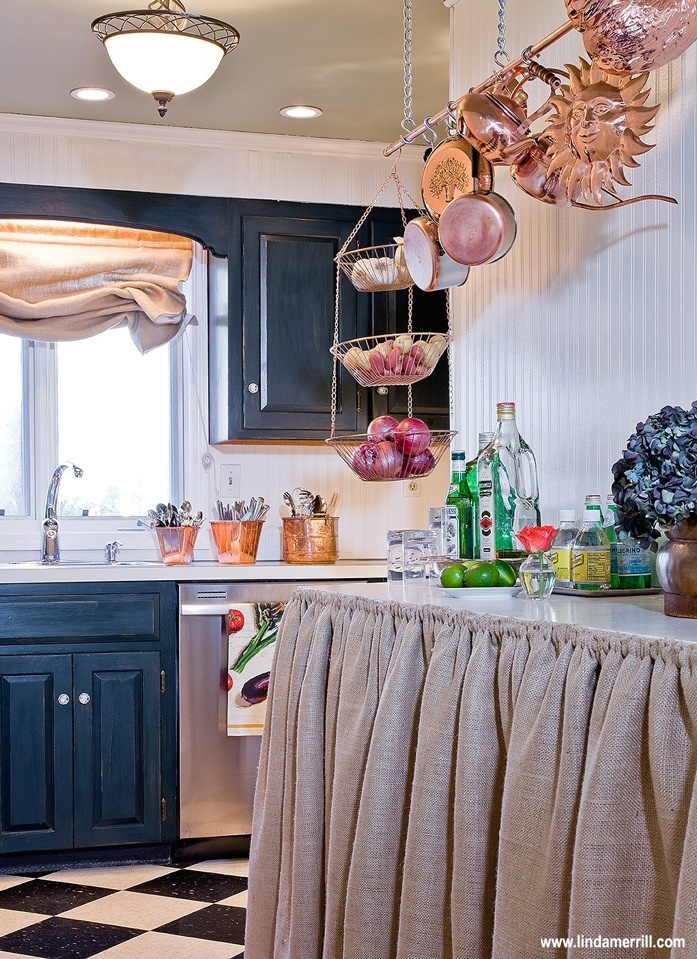
1) After a bit of trial and error, I built a simple base with 2”x2” boards that were secured to the underside of the door with L-brackets. Stretchers were added to stabilize the legs on the ends of the counter and were placed about 10” up from the ground. We used glue and L-brackets to attach the stretchers.
2) The counter needed to be removable in case any of the appliances needed to be moved out of the kitchen, so I didn’t want to bolt the piece in place. Since it wasn’t going to be holding a lot of weight, I decided to stabilize the counter by attaching it to the wall with super-strong Velcro, which worked quite well.
3) I lightly sanded and painted the counter with two coats of glossy exterior trim paint in a color that matched the other white counters.
4) As I wanted covered under-counter storage, I added a burlap skirt all around the front and sides of the piece. Because I had gathered the skirting, it was quite heavy and the Velcro I planned on using to attach it couldn’t stand up to the weight of the fabric. I ended up using nail head trim and discreet stapling to secure the skirt. In retrospect, I would have made a tailored skirt that would have required less than half the fabric of a gathered skirt and been much lighter.
5) I installed plain plastic shelving under the counter and behind the skirt, which provided many additional feet of storage space.
6) I left the doorknob hole as it was because I realized that it was a perfect opening for cords to be plugged into the wall outlet below the counter.
With lumber and supplies, burlap fabric and plastic shelving, I estimated that the counter cost about $25 in total, yet provided much needed surface and storage space.
Updated May 29, 2018.
Looking for a Pro? Call us (866) 441-6648

Remodeling Contractors Experiences

New Tile And Brickwork The Perfect Finishing Touch For A New Home

Tub And Shower Tile Upgrade To Replace Cheap Imitation Marble


