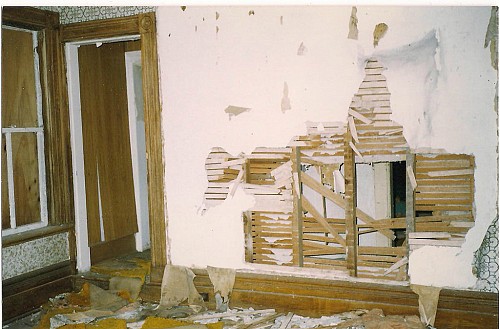
Chipped Plaster Is An Easy DIY Fix
There’s just one problem with plaster (the wall finish of choice before drywall rose to popularity in the 60s): If you have a home with plastered walls, it’s so darn easy for a nice smooth surface to turn into chipped plaster. Whether you’re moving in, rearranging furniture, roughhousing with your kids, or just living life on life’s terms, make one false move and whoops! A dinged wall.
But here’s your daily dose of good news: patching plaster is an easy DIY project. Plus the work makes such a fast, visible difference! Choose from these 4 simple methods of chipped plaster repair.
MacGyver Secret Weapon against Chipped Plaster
COST: about $1.00
“I really shouldn’t be telling you this,” whispered my former landlord (back in the days when he was actively my landlord, and a very pleasant one at that). “There’s a trick for filling in chipped plaster which has been passed down through generations of tenants. They use a secret substance to fill in dents, dings, or cracks in the walls before they move out of a rental house, so they won’t lose their damage deposit.
“It only works on a white plastered wall.
“The secret is surprisingly simple … toothpaste. White toothpaste, of course. Green or striped varieties would be embarrassingly obvious. And do it a week or two before you move out so the minty fresh smell has time to dissipate.”
Did I actually use this secret chipped plaster solver? I’ll never tell.
Conventional Chipped Plaster Fix #1 – Joint Compound
COST: about $12.00
For a more durable (albeit a lot more boring) repair, try the conventional home handyperson method:
- Assemble a few simple supplies –
- drywall joint compound (cost of a small tub: about $12)
- putty knife
- drop cloth
- sponge
- 120-grit sandpaper
- enough primer and paint to cover the site
- Cover your floor with the drop cloth to protect against plaster crumbs and sanding dust.
- Gently remove any remaining loose plaster from the damaged area using your putty knife.
- Wipe the wall around the chipped plaster with a dampened sponge.
- Read the manufacturer’s instructions for your joint compound.
- Rinse the putty knife and utilize it to spread compound lightly over the spot, even with the wall surface. “Feather” the edges for optimal blending.
- Allow the product to dry thoroughly (usually about 24 hours).
- Sand the filled patch so that it is completely smooth and level with the rest of the wall.
- Wipe away any sanding dust with your damp sponge.
- Apply primer atop the chipped plaster repair and about 6 inches around it.
- Paint to blend in with the existing wall color.
Conventional Chipped Plaster Fix #2 – Ready-Mixed Plaster Filler
COST: about $16
Steps 1 through 5 – same as the procedure for joint compound. You’ll need to add a float as part of your equipment.
- Apply ready-mixed plaster filler with smooth upward strokes of a putty knife or trowel until it’s even with the wall surface.
- Wet the float and use it to smooth the filler.
- Allow the plaster filler to firm up but not dry completely.
- Go over the repair again with your wet float.
- Let dry for 24 hours before priming and painting.
The Easiest Great-looking Chipped Plaster Repair
COST: about $75-150 (painting not included), depending on size and number of chips
Suppose you’re not the DIY type ... or perhaps the chipped plaster damage is extensive … or you just don’t have the time or inclination to repair your own walls (and you happen to be out of toothpaste). Don’t worry; there is help in sight.
Find a reliable handyman to take care of your chipped plaster problem for you. He (or she) will do a professional job and have your walls looking as good as new in no time.
Laura Firszt writes for networx.com.
Updated October 28, 2018.
Looking for a Pro? Call us (866) 441-6648

Related Experiences

Replacement Of A Light Fixture That Literally Fell Off The Ceiling

Emergency Roof Repair To Replace Broken Shingles


