How to Add an Outlet

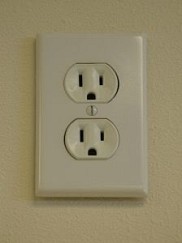
Is your house short of electrical outlets? This is a common problem in older homes, where outlets tend to be few and far between compared to more modern residences. Fortunately, it is quite possible to install one or more additional electrical outlets. Learn how to add an outlet here.
First shut electric power off!
IMPORTANT: For your safety, before you start any electrical project or repair, it is essential that you shut the power off to avoid shocks or even electrocution. Trip the breaker of the circuit you will be working on and check it with a neon tester to make sure the power is off.
Access a power source
When you go to add an outlet, remember that not all of the wiring in your walls will have all the necessary wires for you to tap into to hook up a new outlet. But most outlet receptacles do have the necessary wiring (excluding switched outlets). Therefore, the most common power source to run a new wire from is an existing outlet.
Correlate screw colors and wire colors
Now you will need to correlate the screw colors on the outlet to the appropriate wire colors. The wires and screws must be color coded for universal use so there are no wiring errors. The chrome color screw will have the neutral wire, or grounded conductor (white or gray), attached to it. The brass color screw will have the hot wire (black or red) attached. The green screw of the outlet will be attached to the equipment grounding wire, which is a bare wire or a green wire. Most home wiring is complete with either No. 14 gauge or No. 12 gauge wiring.
Run a cable from the existing outlet
To add the new outlet, you will need to run a new cable between the existing outlet and the new outlet. Make sure you are utilizing the same size cable; the size is usually stamped on the wire. In most cases you will run the wire cable to enter the existing outlet's electrical box. Strip away a minimum of 6 inches of wire inside the box and do the same when you get to the new electrical box location.
After you have run the wires to the new electrical box, you will need to connect it to the outlet. The black hot wire needs to be connected to the brass color screw, the neutral or white wire to the chrome screw and the bare wire must be grounded to the grounding screw on the electrical box and the grounding screw, or green screw, of the outlet. Once the wires are connected to the outlet, push everything into the electrical box. Then screw in your outlet and faceplate to complete the project.
To DIY or not to DIY?
Electrical work is a difficult and potentially dangerous project, suitable only for very experienced do-it-yourselfers. If you are at all unsure of your DIY electrical skills, hire a professional electrician to ensure the job is done right.
Updated October 7, 2018.
Looking for a Pro? Call us (866) 441-6648

Electrical Average Costs
Electricians Experiences

Whole House Fan Installation Saves Me Money On Electricity

Parking Lot Lights Restored So Employees Can Reach Cars Safely


